VPNs Done Right
Your ISP sees everything you do online.
Every website you visit, every file you download, every search you make—your Internet Service Provider logs all of it. They sell this data to advertisers. They hand it over to law enforcement without warrants. They throttle certain traffic. They know more about your browsing habits than your closest friends.
Your IP address is your digital fingerprint. Every website you visit sees it. It reveals your approximate location, your ISP, and ties all your activity together.
This week, you’ll learn to hide your IP address using a VPN. You’ll understand exactly what VPNs protect (and what they don’t), how to choose a trustworthy provider, and set up Mullvad VPN on Linux Mint.
Understanding Network Privacy
What Your ISP Sees
Without protection, your ISP observes:
- Every domain you visit (even with HTTPS, they see the domain name via SNI)
- When you visit (timestamps of all connections)
- How much data you transfer
- Your IP address (assigned by them, tied to your account)
- DNS queries (if using their DNS servers)
HTTPS protects the content (they can’t see what you typed in a form), but not the metadata (they know you visited bank.com at 3am and spent 20 minutes there).
The IP Address Problem
Your IP address:
- Reveals your approximate location (city-level accuracy)
- Identifies your ISP
- Links all your online activity together
- Can be logged by every website you visit
- Is trivially subpoenaed from your ISP
When a website logs your IP, they can:
- Track you across visits (even without cookies)
- Estimate your location
- Work with law enforcement to identify you
Two Solutions: VPNs and Tor
VPN (Virtual Private Network):
- Routes your traffic through a server operated by the VPN provider
- Hides your IP from websites (they see the VPN server’s IP)
- Encrypts traffic from your ISP
- Requires trusting the VPN provider
- Fast, suitable for daily use
Tor (The Onion Router):
- Routes traffic through 3+ volunteer-operated relays
- Each relay only knows the previous and next hop
- No single entity sees both your IP and your destination
- Very slow compared to VPN
- Maximum anonymity, no trust required
Part 1: Understanding VPNs
How VPNs Work
Without VPN:
You → ISP → Website
(ISP sees: your IP + destination)
(Website sees: your IP)
With VPN:
You → ISP → VPN Server → Website
(ISP sees: your IP + VPN server)
(Website sees: VPN server's IP)
(VPN provider sees: your IP + destination)
The trust shifts. Instead of trusting your ISP, you trust your VPN provider.
What VPNs Do and Don’t Do
VPNs DO:
- ✅ Hide your IP from websites
- ✅ Encrypt traffic from your ISP
- ✅ Bypass geographic restrictions
- ✅ Protect on untrusted networks (coffee shop WiFi)
- ✅ Prevent ISP throttling of specific services
VPNs DON’T:
- ❌ Make you anonymous (VPN provider knows who you are)
- ❌ Protect against browser fingerprinting
- ❌ Prevent website tracking (cookies, JavaScript)
- ❌ Hide that you’re using a VPN
- ❌ Protect against malware or phishing
Critical point: VPNs are privacy tools, not anonymity tools. Your VPN provider can see everything your ISP would have seen.
Choosing a VPN Provider
Most VPN providers are garbage. They log your data, sell your browsing history, or make false “no-logs” claims.
What to look for:
- No-logs policy (verified by independent audits)
- Jurisdiction (avoid Five Eyes countries if possible)
- Open source clients (auditable code)
- Payment options (accept cryptocurrency for privacy)
- Track record (has their no-logs claim been tested in court?)
Red flags:
- ⚠️ “Free” VPNs (you’re the product)
- ⚠️ Lifetime subscriptions (unsustainable business model)
- ⚠️ Vague privacy policies
- ⚠️ No third-party audits
- ⚠️ Excessive marketing claims (“military-grade encryption”)
Recommended VPN Providers
Mullvad (Our recommendation)
- Based in: Sweden
- Price: €5/month flat (no discounts, no upsells)
- Payment: Cash by mail, cryptocurrency, card
- No-logs: Yes, verified by audits and Swedish police requests
- Open source: Yes, clients are open source
- Unique: Account numbers instead of email/password
Why Mullvad:
- No email or personal info required
- Pay with cash or Monero for maximum privacy
- Flat pricing (no manipulative “3-year deals”)
- Proven no-logs policy (Swedish authorities couldn’t get data)
- Partnered with Tor Project to create Mullvad Browser
ProtonVPN (Alternative)
- Based in: Switzerland
- Price: Free tier available, paid from $5/month
- Payment: Card, PayPal, Bitcoin
- No-logs: Yes, audited
- Open source: Yes
Why ProtonVPN:
- Free tier (limited servers, no P2P)
- Integrates with Proton Mail ecosystem
- Good for users already in Proton ecosystem
- Swiss privacy laws
Part 2: Setting Up Mullvad VPN
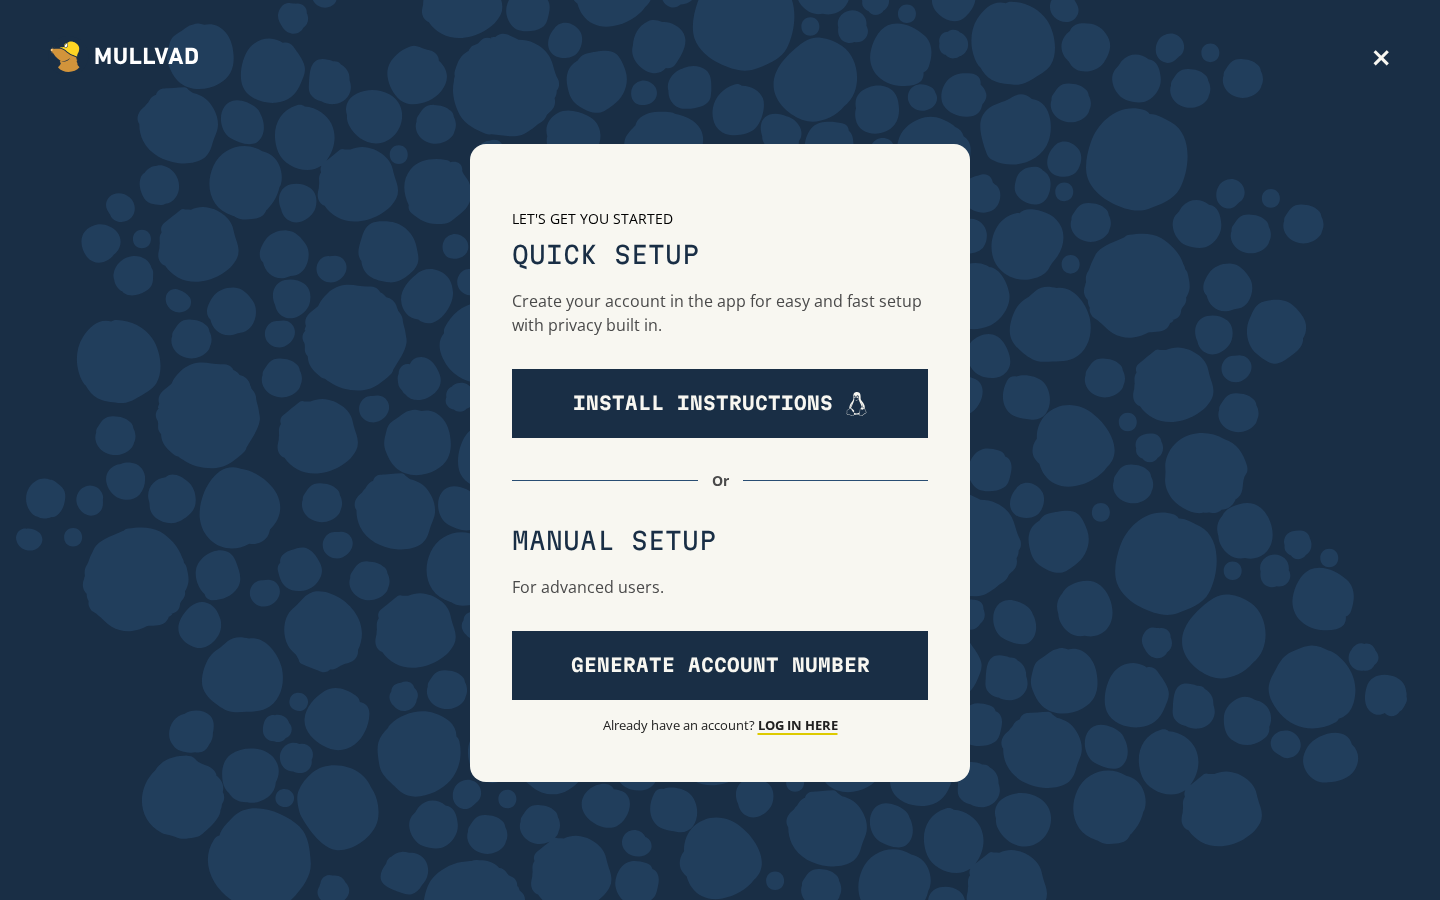
Create Account (No Personal Info Required)
- Go to https://mullvad.net/
- Click Generate account
- You receive a 16-digit account number (e.g.,
1234 5678 9012 3456) - Save this number securely (in your password manager!)
- No email, no password, no personal information
Add Time to Your Account
Option 1: Cryptocurrency (Most Private)
- On account page, click Add time
- Select Bitcoin or Monero
- Send exact amount to provided address
- Time added automatically after confirmation
Option 2: Cash by Mail (Maximum Privacy)
- Write your account number on paper
- Put cash (€/$/SEK) in envelope
- Mail to Mullvad’s Sweden address
- Time added when received
Option 3: Card/PayPal
- Click Add time → Card
- Complete payment
- Time added immediately
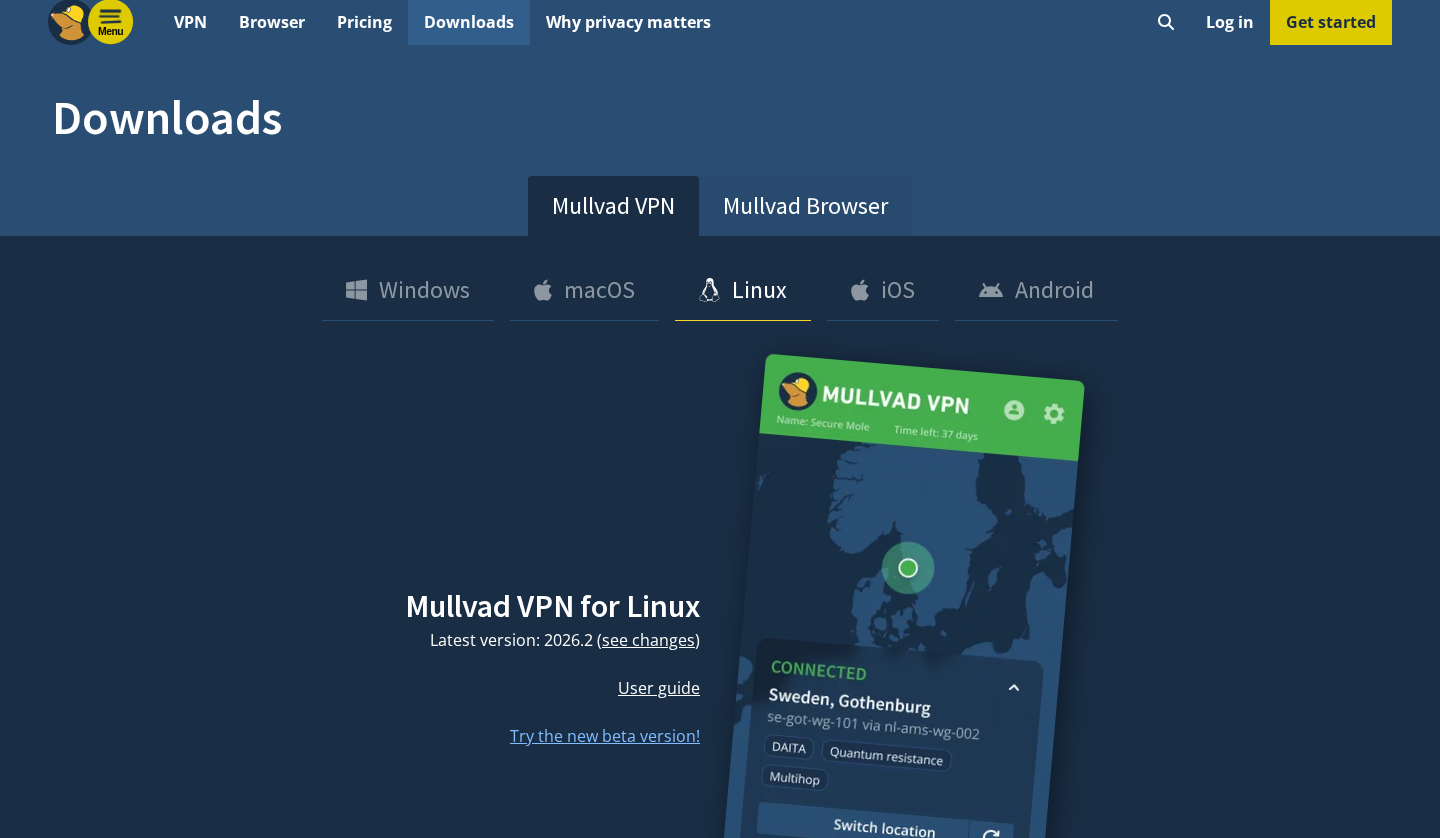
Install Mullvad Client on Linux Mint
- Go to https://mullvad.net/download/
- Download the Linux (.deb) package
- Open Terminal (
Ctrl+Alt+T) - Navigate to Downloads:
cd ~/Downloads - Install the package:
sudo apt install ./MullvadVPN-*.deb
 Visit this page yourself: if you see your own city listed at the top of Mullvad’s site, that’s proof you’re not yet protected.
Configure Mullvad
- Open Mullvad VPN (Menu → Internet → Mullvad VPN)
- Enter your 16-digit account number
- Click Login
- Go to Settings → VPN settings
- Configure these options:
- Auto-connect: Enable (VPN starts automatically)
- Kill switch: Enable (blocks internet if VPN drops)
- DNS content blockers: Enable Ads, Trackers, Malware
Connect to VPN
- In the main Mullvad window, click Secure my connection
- The app connects to the nearest server
- Status shows “CONNECTED” with green indicator
To choose a specific location:
- Click Switch location
- Select country and city
- Click to connect
Verify VPN is Working
- Visit https://mullvad.net/check
- Should show: “You are using Mullvad” in green
- Your displayed IP should be different from your real IP
Note:
mullvad.net/checkonly turns green for Mullvad specifically. On any other VPN it’ll say “You are not using Mullvad” — that’s expected, not a failure. To confirm any VPN is working (or to check for leaks regardless of provider), use the general tests below.
Also verify at:
- https://ipleak.net/ — Check for IP and DNS leaks
- https://browserleaks.com/ip — Verify IP is masked
Part 3: VPN Best Practices
When to Use Your VPN
Always use VPN for:
- General browsing (hide from ISP)
- Public WiFi networks
- Accessing geo-restricted content
- Any activity you don’t want tied to your real IP
Consider disabling VPN for:
- Banking (may trigger fraud alerts)
- Local services that need your real location
- Speed-critical activities (gaming, video calls)
VPN Kill Switch
A kill switch blocks internet access if VPN disconnects unexpectedly. This prevents IP leaks.
On Mullvad:
- Enabled by default in settings
- Test it: Connect to VPN, then force-close the VPN app
- Your internet should stop working until you reconnect
Split Tunneling (Advanced)
Split tunneling lets some apps bypass the VPN. Useful for:
- Banking apps (need real IP)
- Local network printers/devices
- Speed-sensitive applications
On Mullvad:
- Settings → Split tunneling
- Add apps that should bypass VPN
- Those apps use your real connection
Caution: Split tunneling can leak your real IP if misconfigured.
DNS Leak Prevention
DNS leaks expose your browsing even with VPN active.
Mullvad prevents leaks by:
- Routing DNS through VPN tunnel
- Blocking non-VPN DNS queries
- Optional DNS content blocking (ads, trackers, malware)
Test for leaks:
- Connect to VPN
- Visit https://dnsleaktest.com/
- Run extended test
- All DNS servers should be VPN provider’s servers
Multiple Devices
Your Mullvad account works on 5 devices simultaneously.
Install on:
- Linux desktop (covered above)
- Phone (Android/iOS apps available)
- Other computers
Each device uses the same account number.
Privacy Checkpoint
Your network traffic is now protected from ISP surveillance:
What changed:
- ISP sees only encrypted VPN traffic
- Websites see VPN server’s IP, not yours
- DNS queries go through VPN
What you gained:
- Privacy from ISP monitoring
- Protection on public WiFi
- Harder to track by IP address
What you traded:
- VPN provider sees your traffic (choose wisely)
- Slight speed reduction
- Some websites may not work
- Monthly cost (~$5)
What VPN doesn’t give you:
- Anonymity (VPN knows who you are)
- Protection from tracking (cookies, fingerprinting still work)
- Protection from your own mistakes
Troubleshooting
VPN won’t connect
Try:
- Check your account has time remaining
- Try a different server location
- Restart the VPN client
- Check firewall isn’t blocking VPN ports
- Try switching between WireGuard and OpenVPN protocols
Internet works without VPN but not with
Possible causes:
- Kill switch blocking—try disabling temporarily to diagnose
- DNS resolution issues—try Mullvad’s DNS servers
- Network firewall blocking VPN traffic
Slow speeds with VPN
Try:
- Connect to geographically closer server
- Try WireGuard protocol (faster than OpenVPN)
- Check your base internet speed (maybe VPN isn’t the issue)
- Different server in same location (load varies)
IP still shows as real IP
Check:
- VPN actually connected (look for green indicator)
- Browser extensions that might bypass VPN
- WebRTC leak (Firefox:
about:config→media.peerconnection.enabled= false) - Split tunneling not accidentally enabled
Website blocks VPN
Some services block known VPN IPs:
- Try different server in same country
- Some VPNs offer “obfuscated” servers
- Accept that some services require real IP
- Use split tunneling for specific apps
Going Further (Optional)
WireGuard vs OpenVPN
Mullvad supports both protocols:
WireGuard:
- Faster, more modern
- Better battery life on mobile
- Simpler code (easier to audit)
- Default on Mullvad
OpenVPN:
- More mature, battle-tested
- Better compatibility with restrictive networks
- More configuration options
- Use if WireGuard blocked
Running Your Own VPN
For maximum control, run your own VPN server:
- WireGuard on VPS (simple, fast)
- OpenVPN for more features
- Services like Algo make setup easy
Trade-offs:
- You control the server (no third-party trust)
- But: Single IP more easily identified as “yours”
- Server costs money
- You’re responsible for security
VPN at Router Level
Instead of per-device VPN:
- Flash router with OpenWrt/DD-WRT
- Configure VPN on router
- All devices automatically protected
- No need for VPN apps on each device
What’s Next
VPNs protect you from ISP surveillance, but they don’t provide true anonymity—your VPN provider still knows who you are. For situations requiring stronger anonymity, you need Tor.
Week 8 covers Tor Browser—the anonymity network that routes your traffic through multiple relays so no single entity sees both your identity and your destination.
Summary
This week you:
- Understood what VPNs actually protect (and what they don’t)
- Learned to evaluate VPN providers for trustworthiness
- Set up Mullvad VPN on Linux Mint
- Configured kill switch and DNS leak protection
- Verified your VPN is working correctly
- Learned VPN best practices for daily use
Your ISP can no longer see your browsing activity. Combined with encrypted messaging (Week 6), encrypted email (Week 5), and hardened browser (Week 3), you’ve significantly reduced your digital footprint.
💻 Ready for the command line? Cypherpunk 101 digs into VPN-vs-Tor trade-offs, when to combine them, and why “just use Tor” is often the answer: Cypherpunk 101 Week 7 (Part 2): Advanced Tor — VPNs, Bridges & Relays →